Targeting Presets
To reduce time spent on manual processes while trafficking, you can utilize Targeting Presets. This expands preset functionality for Campaigns and Line Items which pre-populates fields in the Overview tab. This feature adds enhanced ability to cut down the time required to fill out targeting that is meant to be consistent across multiple Line Items.
Some example use cases for Targeting Presets may be seen below.
As a user, I'd like all line items under my campaign to:
- Target all regions belonging to England rather than the entire United Kingdom
- Target all U.S. states that are cannabis-friendly rather than the whole country
- Target a set of pre-bid segments to prevent fraud
With Targeting Preset Workflows you can:
- Create a new Targeting Preset from scratch or from an existing Line Item's Targeting
- Set a Targeting Preset as a default, so all new Line Items have targeting pre-populated with the values from the preset
- Apply a Targeting Preset to Line Item Targeting
How it Works
There are two ways to create a new Targeting Preset:
-
Create Target Preset from scratch
- Navigate to Admin > Presets.
OR Click Create > Targeting Preset.
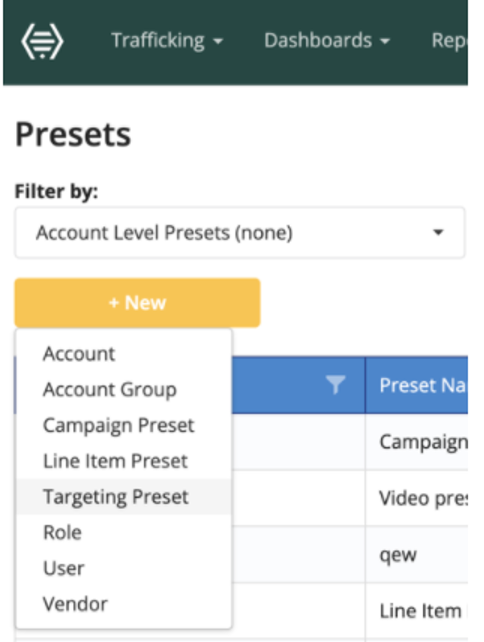
- Enter a name for the Targeting Preset and set it as an Account Level or an Advertiser-specific preset.
- Select your desired targeting.
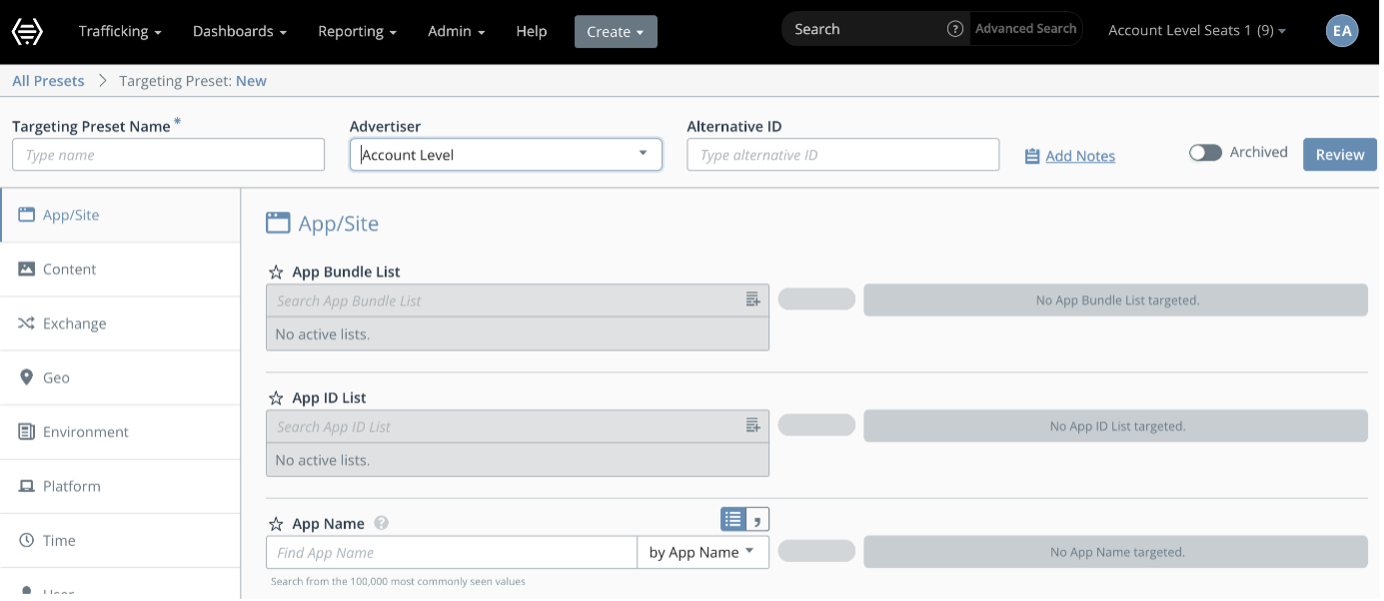 4. Click Save.
 - Navigate to Admin > Presets.
-
Create Targeting Preset from Existing Targeting
-
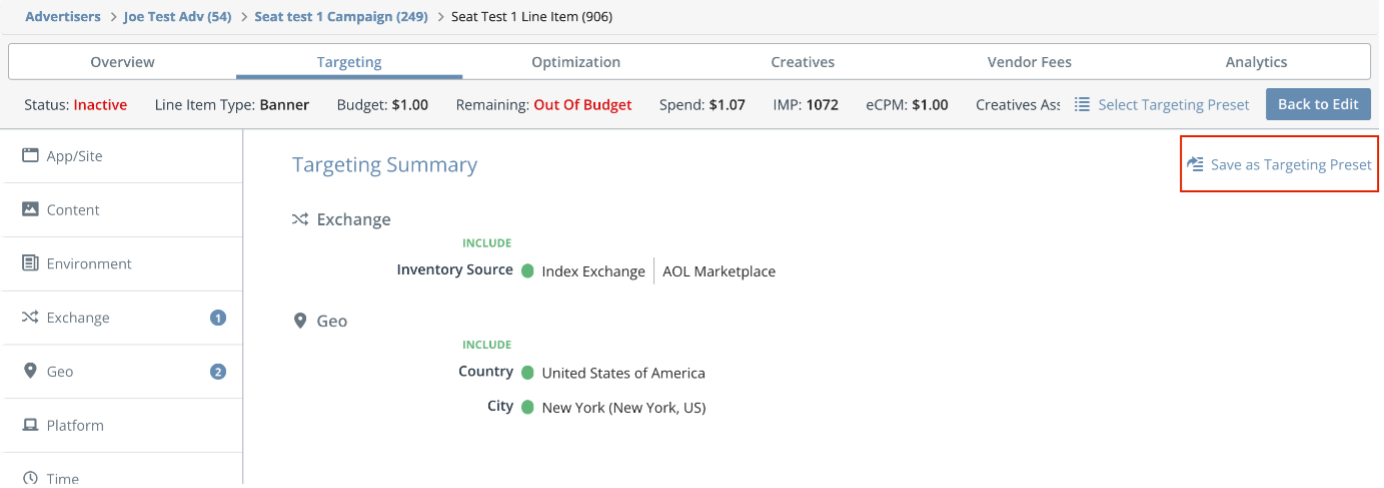
Navigate to the Line Item's > Targeting page and enter your desired targeting.
-
On the Review page, click Save as Targeting Preset.
-
Enter a name for the Targeting Preset, set it as an Account Level or an Advertiser-specific preset.
 4. Click Save to continue.
 -
The other ways you can use Targeting Preset are to set them as default:
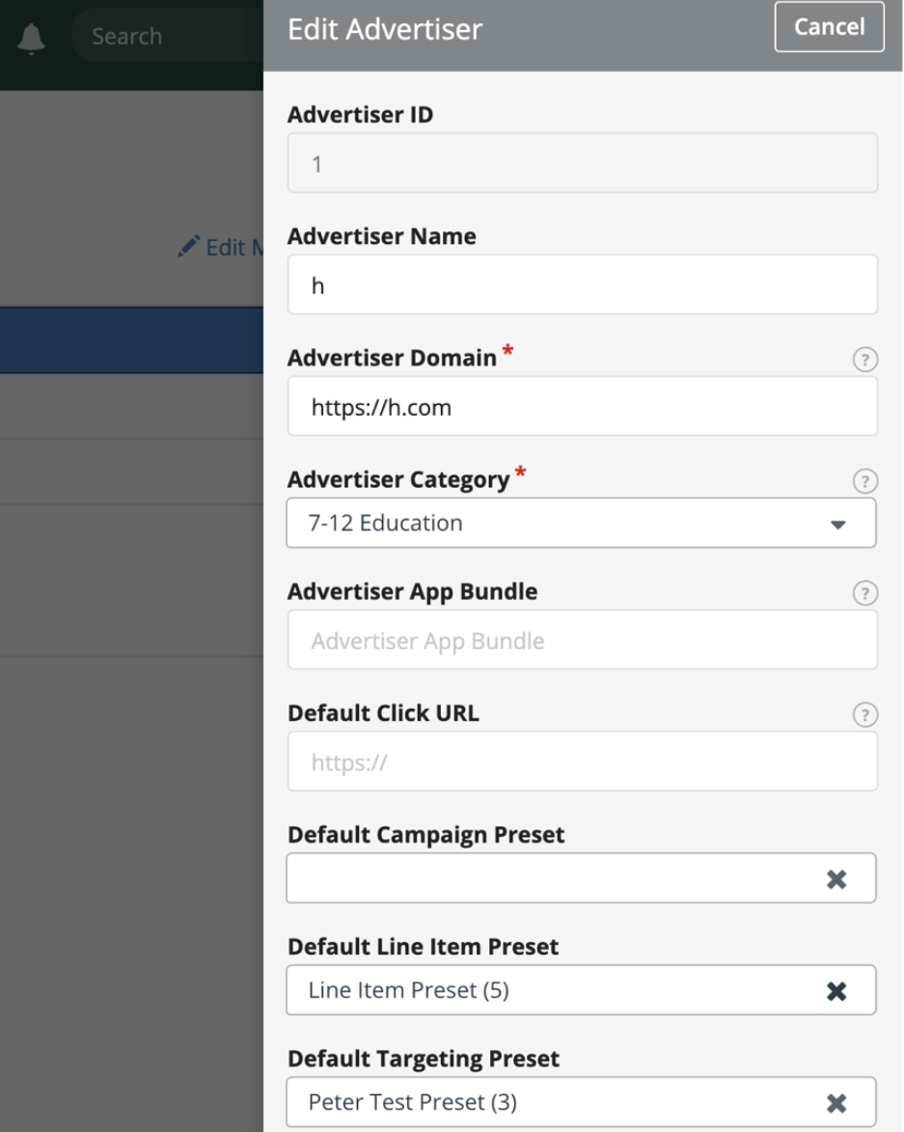
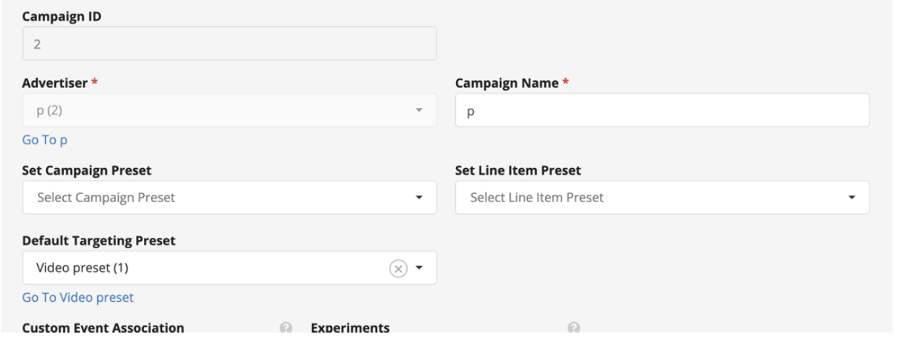
A default Targeting Preset can be configured on the Advertiser level and/or the Campaign level. When a default is set on both, new Line Items will have Targeting initialized to the Campaign-level Targeting Preset default. Note: The available Targeting Presets for selection as a Default is limited to Account-Level Targeting Presets and Targeting Presets specific to that Advertiser.
-
Set a Default Targeting Preset on an Advertiser
-
Set a Default Targeting Preset on a Campaign
-
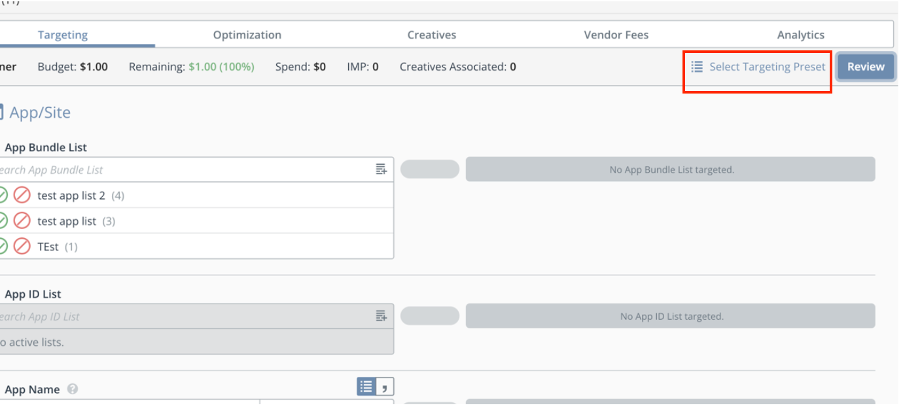
Apply a Targeting Preset to Line Item Targeting
On the Line Item > Targeting page, you can click on Select Targeting Preset to apply on the line item.
 Note: If there is no existing targeting (new line-item creation), then you can choose from the available list of Targeting Presets only.
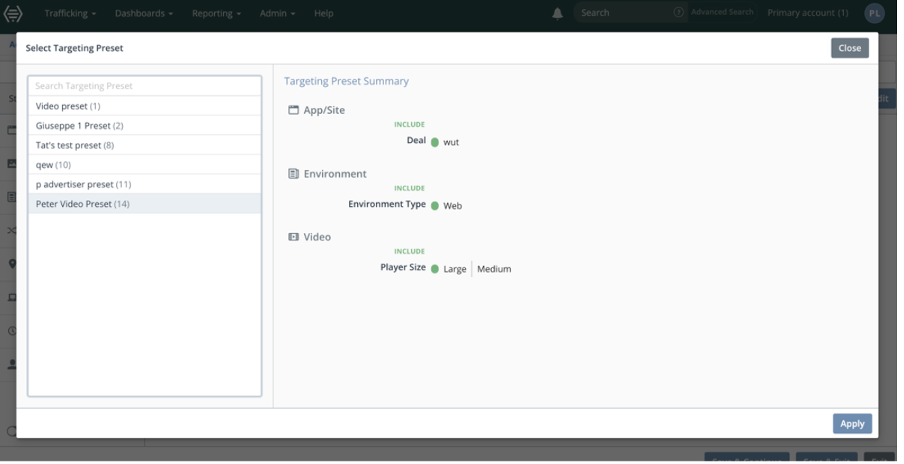
However, if there is existing targeting, you have two options:
- Add to Existing: attempt to merge the selected Targeting Preset with the existing targeting parameters.
- Replace All Values: delete existing targeting parameters and replace them with the selected Targeting Preset.
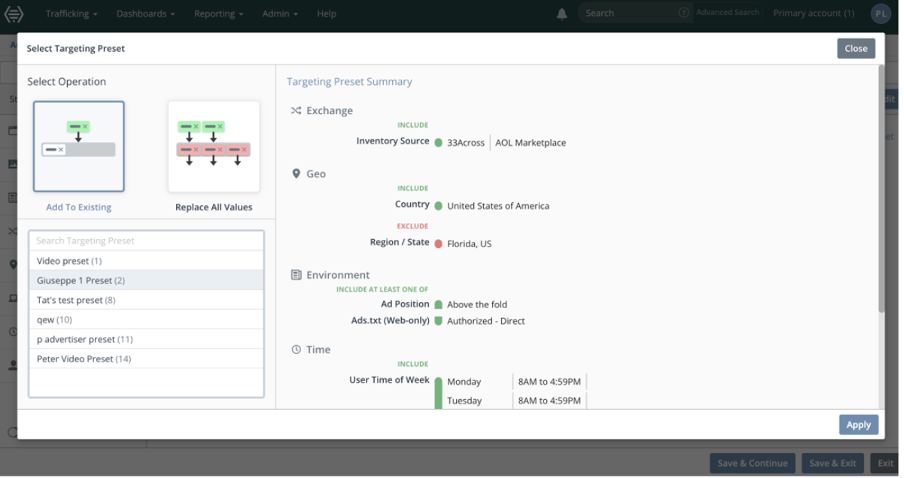
In the Add to Existing scenario, if there are conflicts preventing a clean merge of the two sets of targeting parameters, then resolve the conflicts by choosing the targeting parameters you like to keep.
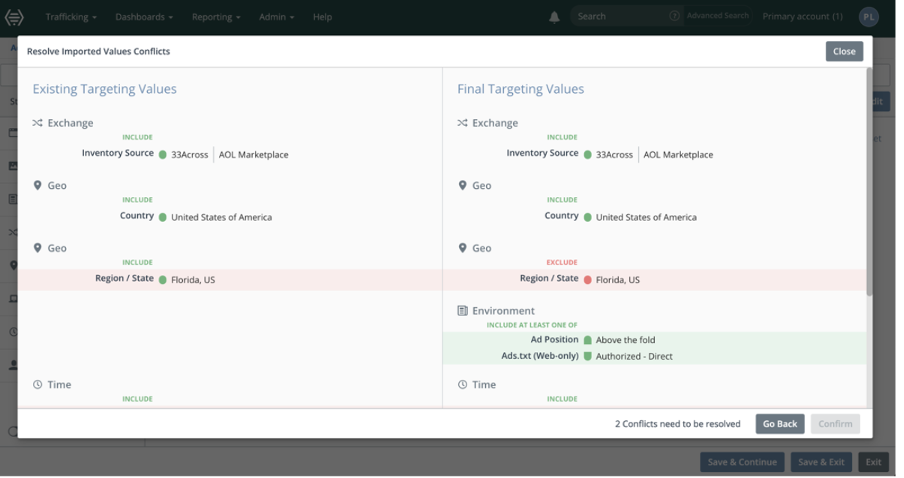
When you hover over one of the options, its highlight changes from red to grey, and a checkmark appears.

The option highlights in green to indicate that it is the targeting parameter to be set once all the conflicts are resolved and the Targeting Preset is merged.

FAQ
Can I use this feature through the API?
No, this is a UI-only feature.
How does validation work?
Validation occurs once the Targeting Preset is applied to the Line Item and on save.
What happens if I archive a Targeting Preset?
You will no longer be able to apply the Targeting Preset to Line Items. You can no longer set the Targeting Preset as the default on Advertisers/Campaigns, and it will be removed as the default from any Advertisers/Campaigns in which it is currently set. No Targeting Expressions are changed.